| BustedGear.com |
| Shop | Repairs | Manufacturers | Resources | iFAQs | About |
|
|
|||
| Roland® D-50 | 3: Key Removal | ||
|---|---|---|---|
|
Last Page < |
Page Bottom ∨ |
Next Page > |
|
|
|
|||
|
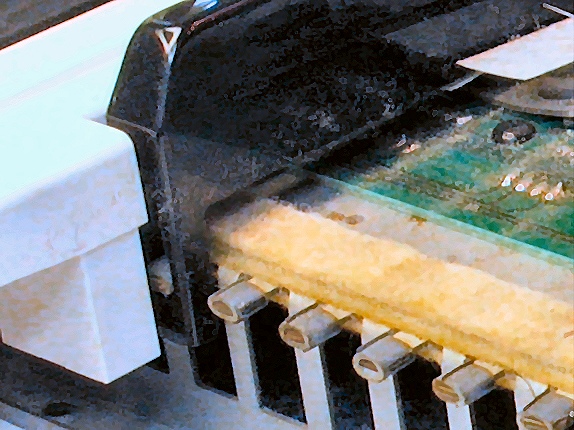
The keybed is now out of the Roland D-50. It's time to remove the misbehaving keys, as well as some of the adjacent keys. With the keybed upside down, notice how the black and white keys protrude through the keybed. Also notice the clear, flexible strips that stop the keys from coming loose (see right). Pry up and remove the stopper strips where keys need removal. |

|
|---|---|
|
A small blade screwdriver can pry up one end of the strip before pulling it off the keybed (see right). When reinstalling the strip, use a little white glue to supplement the strip's original tackiness. Run your fingernail along the strip to firmly attach it. Also, make sure no glue protrudes onto the key hinges. |

|
|
To remove a key, first remove its key spring. You can use a needle nose pliers (see right). Next, remove the key by sliding it forward, then lifting up on its rear. Sharp keys won't come out until the surrounding white keys are removed. |

|
|
Notice here that the spring on the white key is more stretched than the one on the black key. That's because it's a couple of coils shorter. Keep the springs separate and make sure they haven't been installed improperly in the past. There are 36 shorter springs for the white keys and 25 longer springs for the black keys. Proper spring tension yields a consistent action between the long white keys and the short black keys. |

|
|
To reinstall a key, first hook its front through the key frame (see right), then lower its rear into the proper slots and slide it backward. |
|
| Roland® D-50 | ||
|---|---|---|
|
Last Page < |
Page Top ∧ |
Next Page > |
|
|
|
|
|
Page design and content Copyright © Richard Diemer - All rights reserved |