| BustedGear.com |
| Shop | Repairs | Manufacturers | Resources | iFAQs | About |
|
|
|||
| Akai MPC2000XL | 2: Encoder Board Removal | ||
|---|---|---|---|
|
Last Page < |
Page Bottom ∨ |
Next Page > |
|
|
|
|||
|
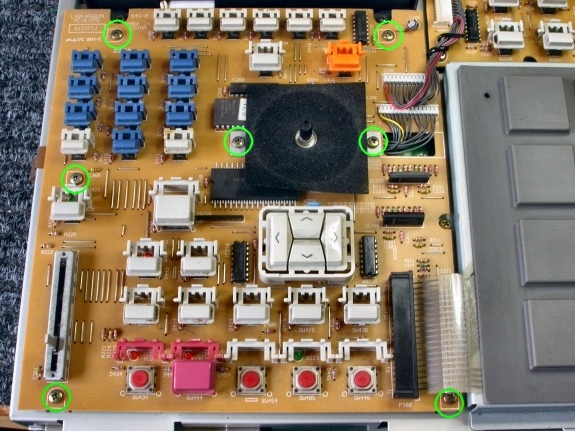
Here you see the PC board holding the MPC2000XL's rotary encoder (jog wheel post). The board must be flipped over to unsolder the part. To do that, first remove the seven brass screws circled in this photo. Two of the screws also hold down a brace for the encoder. Then, the PC board must be detached from the membrane sheet. |
|
|---|---|
|
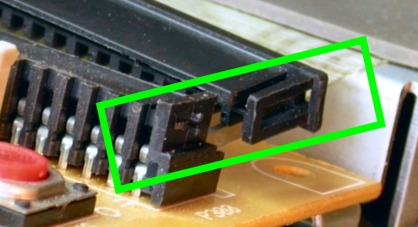
The photo on the right shows how a "slide" snap-locks onto the connector's header.
Pry open the snaps and pull the slide out horizontally. Once it's
out, the tail of the membrane is loose. |
|
|
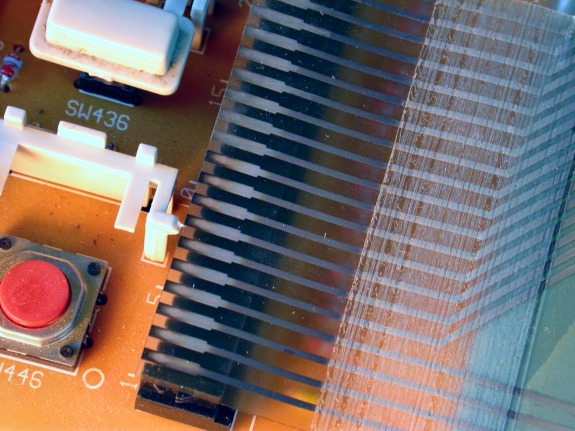
Inspect the tail contacts. If you see dark oxidation, you might want to clean them with a stick eraser. In this photo, half of the contacts have been cleaned. |
|
|
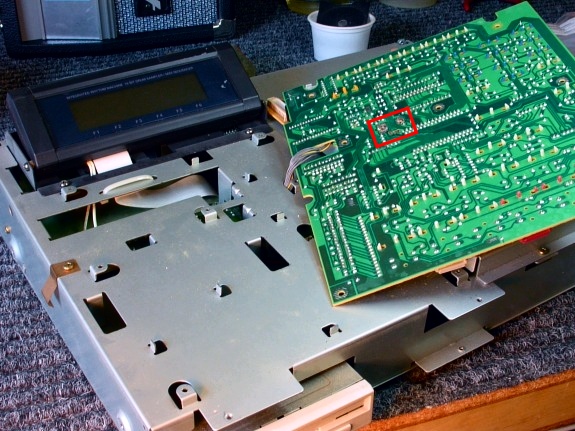
Now you're able to flip over the Encoder PC board and access its solder points. In this photo, the red box shows where the rotary encoder is mounted. |
|
|
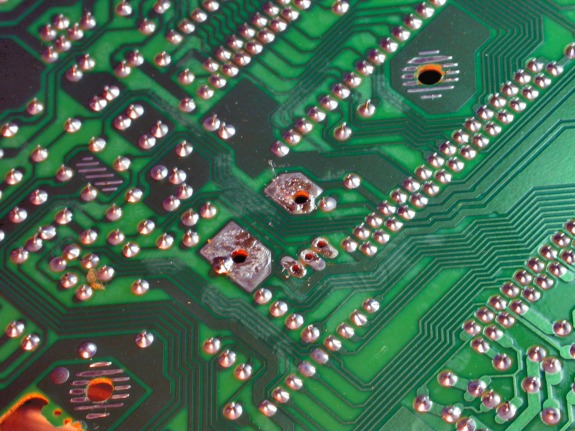
Here, the old encoder is de-soldered and removed from the printed circuit board. The circuit pads are cleaned and ready for soldering in the new encoder. |
|
| Akai MPC2000XL | ||
|---|---|---|
|
Last Page < |
Page Top ∧ |
Next Page > |
|
|
|
|
|
Page design and content Copyright © Richard Diemer - All rights reserved |
