| BustedGear.com |
| Shop | Repairs | Manufacturers | Resources | iFAQs | About |
|
|
|||
| Roland® TR-808 | 1: Opening Up the Rhythm Composer | ||
|---|---|---|---|
|
Last Page < |
Page Bottom ∨ |
Next Page > |
|
|
|
|||
|
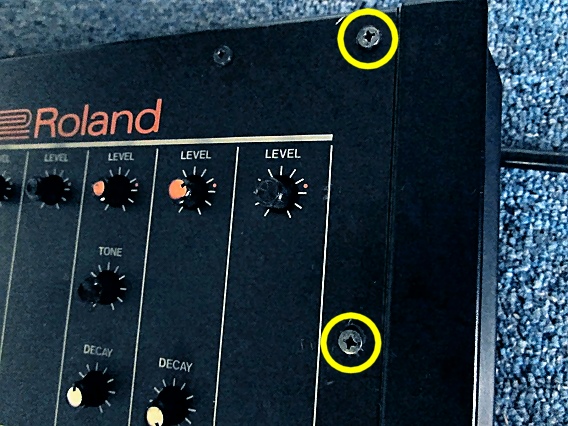
To take apart a Roland TR-808, you must separate the top panel from the bottom chassis. To do this, first remove four screws that attach the top panel to the left and right side panels. In this photo, the right side panel is shown with the screws circled. You will find two more of these screws on the left side. |

|
|---|---|
|
Next, remove three screws from the front edge of the unit (right). |

|
|
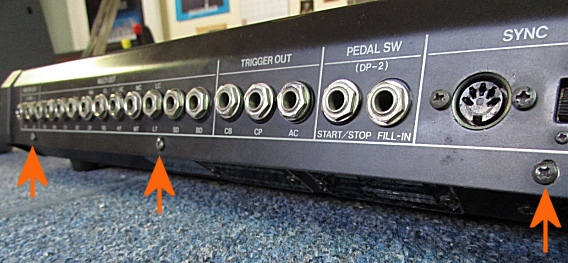
Finally, take out three screws from the bottom edge of the rear panel (right). With all ten screws taken out, you can carefully separate the top and bottom assemblies. |

|
|
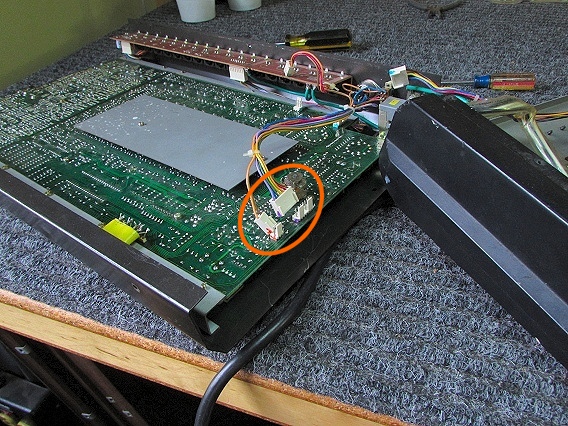
Here, the top and bottom are separated, revealing the underside of a large Printed Circuit Board Assembly (PCBA). The next job is to separate this PCBA from the top panel. To do this, you must unplug six cables and take out some more screws. First, unplug the cables. Two of the cable connectors are shown circled in this photo.
|

|
|
Another two connectors are in the corner, near the On/Off switch.
|

|
|
The last two connectors are on the Jacks PCB, which is mounted to the rear panel. This photo shows one of those connectors.
|

|
|
This photo shows the other Jacks board connector. With all six connectors unplugged, we're ready to unscrew the PCBA from the top panel.
|

|
| Roland® TR-808 | ||
|---|---|---|
|
Last Page < |
Page Top ∧ |
Next Page > |
|
|
|
|
|
Page design and content Copyright © Richard Diemer - All rights reserved |