| BustedGear.com |
| Shop | Repairs | Manufacturers | Resources | iFAQs | About |
|
|
|||
| Korg® Kronos | 2: Key & Hammer Removal | ||
|---|---|---|---|
|
Last Page < |
Page Bottom ∨ |
Next Page > |
|
|
|
|||
|
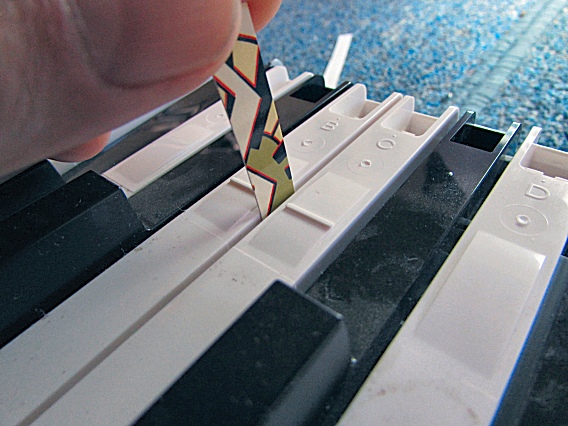
With the keybed out of the Kronos, we begin to remove keys in the area of the problem key. To remove a white key, you push forward on the key's rear. But for the key to slide, you have to push down on a hidden key stopper. The stopper is to the left of the key, as shown here. The 'E', 'F', 'B' and 'C' keys have a ridge that marks the spot. You can push down with any thin tool, like a sturdy business or bank card. |
|
|---|---|
|
This video demonstrates Removing a White Key from a Korg Kronos or SV-1 keybed.
Replacement keys for the Korg Kronos and SV-1 can be purchased on our REPLACEMENT KEYS PAGE. |
|
|
This video shows how to remove a black key and spring. Black keys don't have a key stopper—just push forward on the rear of the key and lift. Before removing a black key, the surrounding white keys must be removed. |
|
|
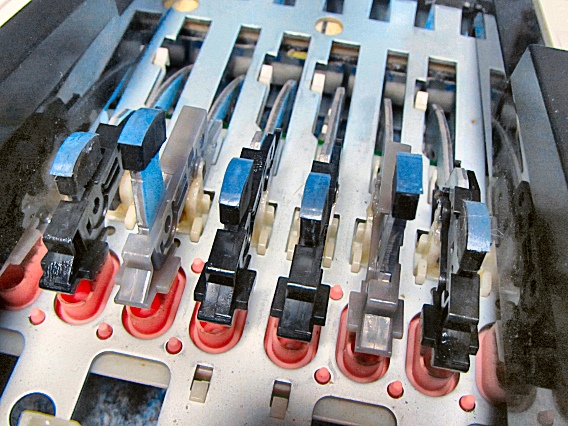
Underneath the keys are the hammers. The black and white key hammers differ. |
|
|
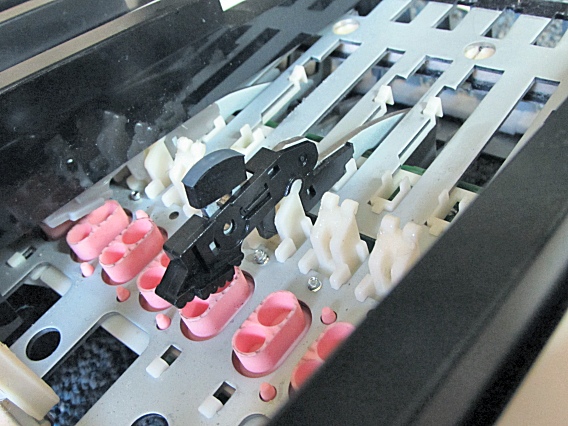
Each key hammer snaps onto a nylon pivot. To remove a hammer, ease it back and upward off the pivot. When a key is pressed, the front of the hammer moves downward and strikes the rubber key switch for that note. |
|
|
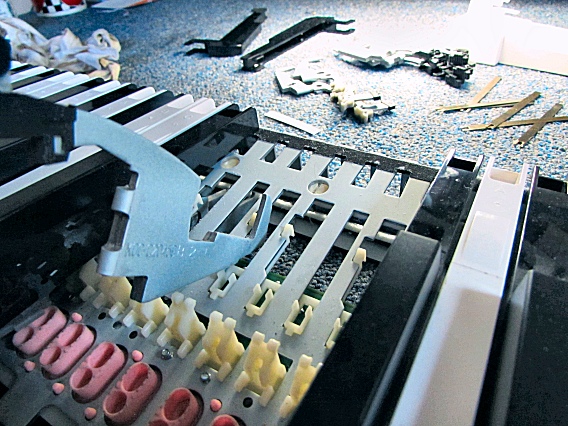
Meanwhile, the weighty end of the hammer is thrown upward, lending a piano-like action. |
|
|
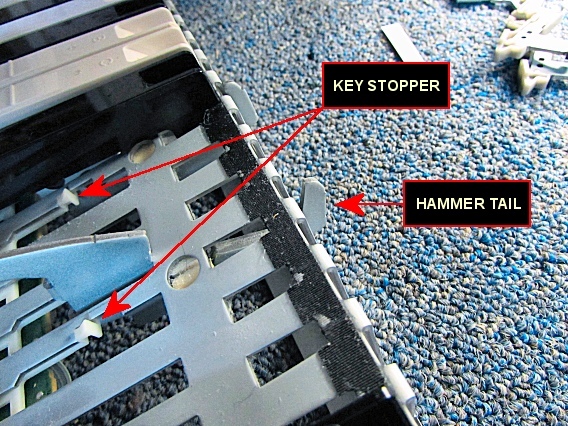
The tail of the hammer extends through a cutout in the rear of the key frame. Here you can see a couple of the white key stoppers. |
|
| Korg® Kronos | ||
|---|---|---|
|
Last Page < |
Page Top ∧ |
Next Page > |
|
|
|
|
|
Page design and content Copyright © Richard Diemer - All rights reserved |