| BustedGear.com |
| Shop | Repairs | Manufacturers | Resources | iFAQs | About |
|
|
|||
| Korg® M1 | 1: CPU & DAC Boards | ||
|---|---|---|---|
|
Last Page < |
Page Bottom ∨ |
Next Page > |
|
|
|
|||
|
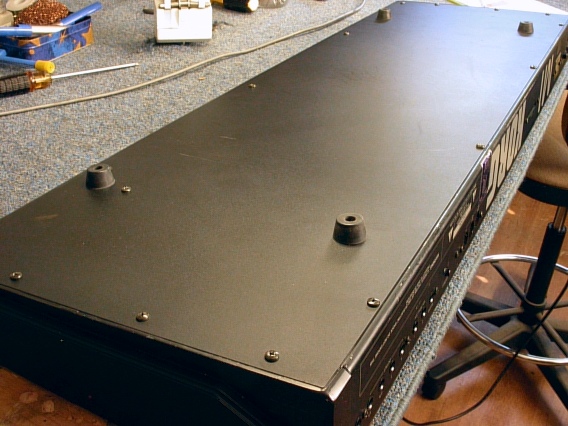
To get started, pull off the Volume and Value slider knobs. Then, flip the keyboard over. USE BLOCKS UNDER EACH END of the keyboard, especially the left end, to prevent breaking the Joystick. Then remove all the bottom screws, except those holding on the feet. All the bottom screws are the same. |
|
|---|---|
|
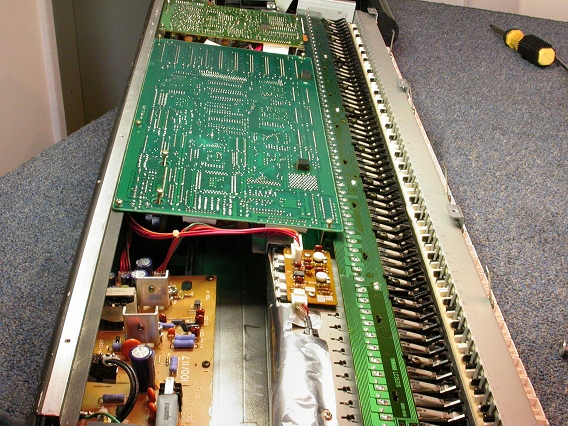
Here you see the bottom cover removed. Two, green circuit boards need to be unbolted. The boards are mounted foil side up. The larger board is the CPU board (Central Processing Unit). The smaller board is the DAC board (Digital to Analog Converter). |
|
|
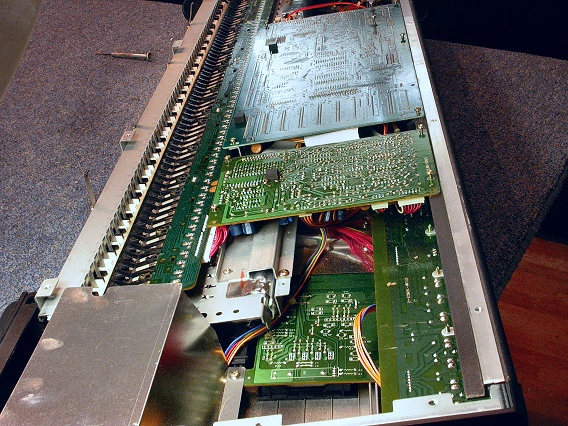
Take out the gold screws along the front and back edges of the two boards. The DAC board (KLM-1261) uses 4 machine screws. The CPU board (KLM-1266) uses 5 machine screws. |
|
|
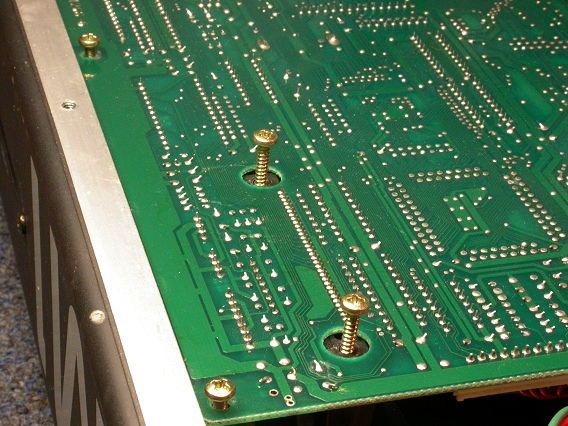
In addition, take out two long self-tap screws, shown here, that attach
the CPU board to the data card slot. |
|
|
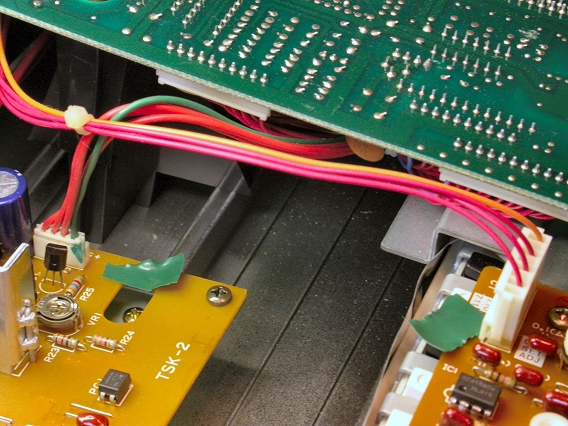
Finally, unplug two connectors, marked with green tape in this photo. The smaller connector plugs into the Power Supply circuit board. The larger connector plugs into the After Touch board, which is mounted onto the keybed. |
|
|
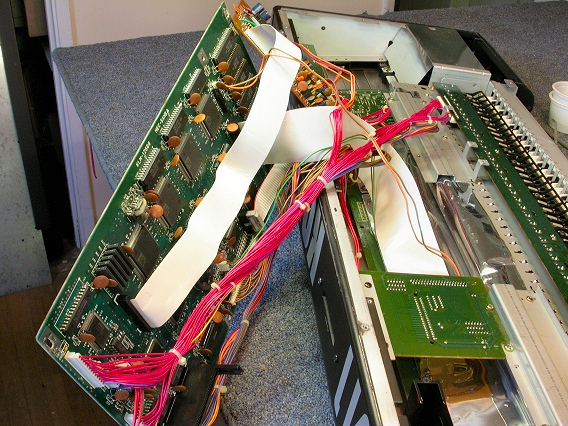
With the screws removed, you can swing the two circuit boards out of the way of the remaining hardware, as shown here. Two bundles of red wires connect the CPU board to the low end of the keyboard. |
|
| Korg® M1 | ||
|---|---|---|
|
Last Page < |
Page Top ∧ |
Next Page > |
|
|
|
|
|
Page design and content Copyright © Richard Diemer - All rights reserved |