| BustedGear.com |
| Shop | Repairs | Manufacturers | Resources | iFAQs | About |
|
|
|||
| Mini Twin-Amp™ Conversion | 2: Wiring | ||
|---|---|---|---|
|
Last Page < |
Page Bottom ∨ |
Next Page > |
|
|
|
|||
 Click Here for a PDF schematic
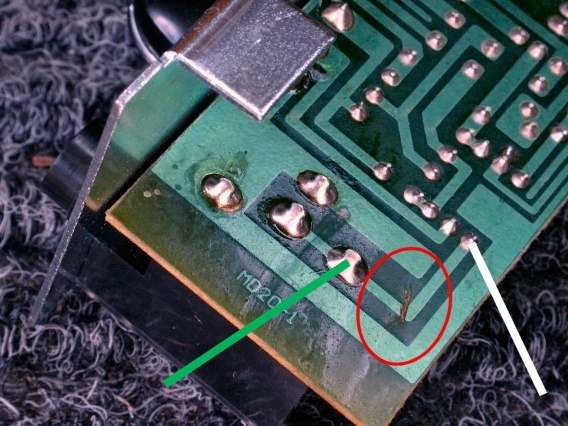
Then prepare two wires about 18" long. Green and white wires are used in this story. Solder them to solder points on each side of the cut, as shown in the photo. The green wire takes the now isolated guitar signal from the INPUT jack. The white wire returns the signal back to the input of the amplifier PC board when the effect is turned on. |
|
|---|---|
|
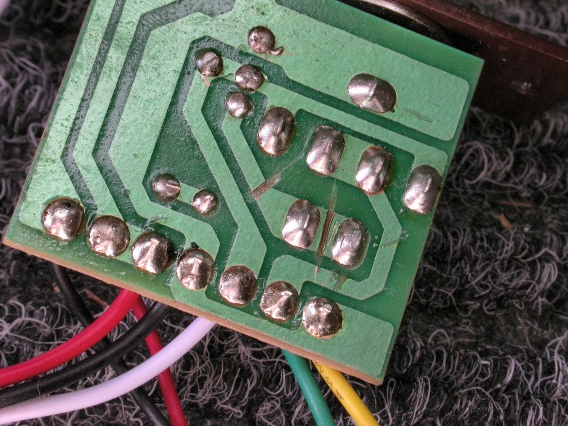
Two cuts must be made on the Jack PC board as shown here. The cut on the left stops the amped signal from reaching the stereo OUTPUT jack. The cut on the right turns the stereo jack into mono by isolating its tip and ring contacts. In this photo, the green and yellow speaker leads are still attached to the board. Unsolder these wires if you haven't already. Reuse them if you like. |
|
|
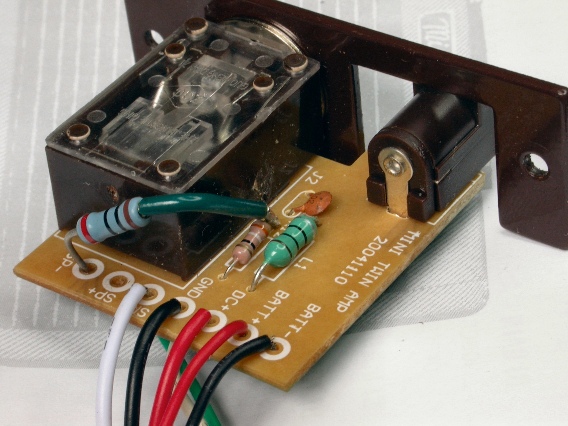
On the component side of the Jack board, a 10Ω load resistor must be connected, as shown in this photo. Solder one resistor lead to point 'SP-' (the point where the yellow wire used to go) and the other lead to the far end of resistor R12. |
|
|
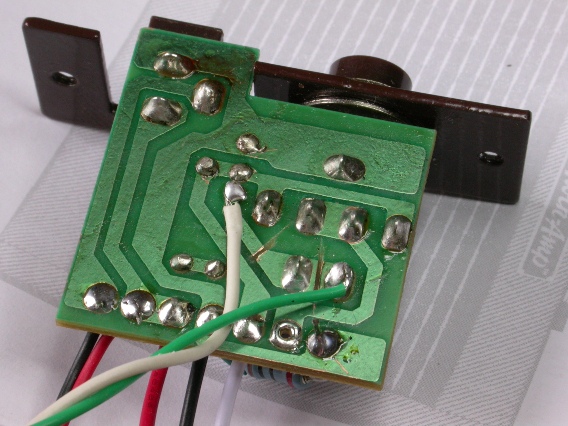
Underneath the Jack board, two wires must be added. Again, 18" lengths should give you enough slack - you can always shorten them later. The green wire goes to the tip contact of the OUTPUT jack and the white wire goes to the amped signal (the same point where you just connected the load resistor). |
|
|
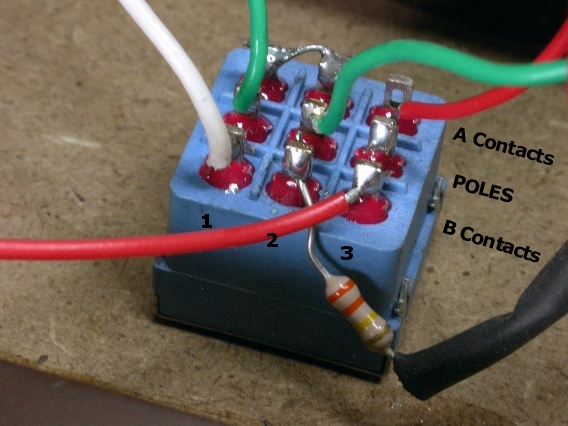
Now you can reinstall the PC boards and hook up the 3P3T footswitch and the LED. Wire one of the three switch poles to the 9-volt supply on the Jack board. In this photo, it's a red wire between the switch and the solder point "DC+". Wire the B contact for this same pole to the anode (the longer lead) of the LED. This wire is also red in the photo. Connect a 470Ω resistor between the LED's cathode and ground. Here, this new resistor is soldered directly to the case of the volume pot and the connecting wire is black. |

|
|
Solder the two green wires, one from the INPUT jack and one from the OUTPUT jack, to the other two poles of the footswitch. In this photo, these poles are numbered 1 and 2, respectively. Also solder a short wire between the A contacts of poles 1 and 2. This is the hard-wired bypass shunt. Connect the white wire from the Main PC board to the B contact of pole 1. Finally, solder a 330kΩ resistor between the B contact of pole 2 and the white wire from the Jack PC board. |
|
|
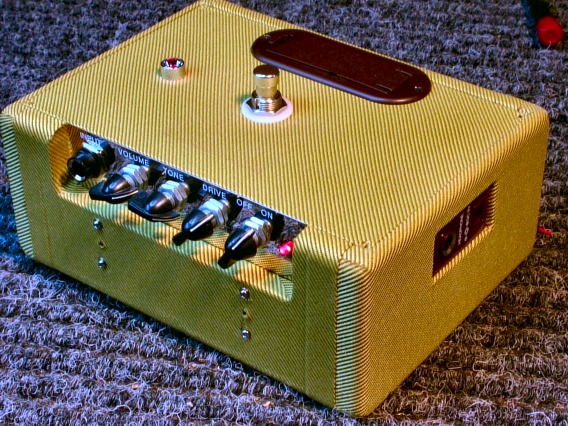
Now close up the stomp box and check it out. The Mini-Twin's VOLUME control should be pretty unusable over about "4". Use the VOLUME control to balance the loudness of the bypassed and overdriven sounds. Use the DRIVE and TONE controls to adjust the effect. |
|
| Mini Twin-Amp™ Conversion | ||
|---|---|---|
|
Last Page < |
Page Top ∧ |
Next Page > |
|
|
|
|
|
Page design and content Copyright © Richard Diemer - All rights reserved |